Car based Pick-up
30/9/2022
I posted the following on The Unofficial Mamod & Other Steam Forum:
Rummaging around under the bench the other day, looking for something unrelated, I rediscovered this bag of rust. Buried in amongst the rust is half of an early SA1. I originally bought it for not much more than the postage IIRC. I think it's about time I binned it or did something with it.
 One possibility is to restore it as an SA1, but it would end up half obviously new and half obviously old and tatty. I'm playing around with the idea of a vintage Bugatti style single seater. Any other ideas anybody? One stipulation is that the end result must be no bigger than an SA1 (due to shelf space limitations).
I got several replies including some interesting suggestions. Many of the proposals were in direct contradiction to my size stipulation! One that caught my eye and seemed popular was a pickup truck. At first, I was going to reject this idea due to it's likely size - specifically the cab height. However, studying my existing SA1 in relation to the available shelf space, I decided that the cab might just be made to fit or, if necessary, omitted. (Apparently, not all early pickup trucks had cabs.)
8/10/2022
Well, I've made a start - albeit a destructive rather than a constructive one ?? I'll probably go for the pickup idea but I haven't committed myself yet. Whatever I go for, I have to start with dismantling what I've got.
 Getting this far was certainly not easy! Everything was rusted solid, and I mean SOLID! I used plenty of this stuff ...
 ... and even, sad to admit, some of this:
 I've started ordering some bits that I will need whatever ...
 The next stage will involve plenty of this ...
 ... and this ...
 ... and I've always got plenty of these ...
 ... although it'll be a while before I get that far.
1/11/2022
It's been a while since I started this project, but nothing really interesting has been happening. I've been busy cleaning, stripping, de-rusting and priming.
 There's still traces of rust and old paint underneath the new primer but, hey, who wants a perfect finish on a pickup? ;-)
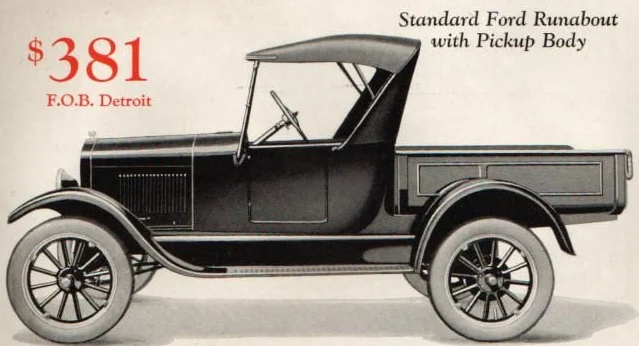
I'm getting to the stage where I can start assembling some bits so I can make some decisions on what modifications I'm going to make. I've decided to definitely go for the pickup idea; mainly inspired by this example ...
There's still traces of rust and old paint underneath the new primer but, hey, who wants a perfect finish on a pickup? ;-)
I'm getting to the stage where I can start assembling some bits so I can make some decisions on what modifications I'm going to make. I've decided to definitely go for the pickup idea; mainly inspired by this example ...
 ... so I've started ordering some parts and materials along those lines. It would be nice if I could get hold of a suitable folding canopy, but I think it's beyond my skills to make my own. It might end up as an open cab.
10/11/2022
Progress on this project is NOT happening by leaps and bounds. I started with a partial assembly of some of the old and new parts, in order to ponder some of the modifications that I'm thinking about.
 One of the suggested ideas I was considering was to replace the simple one-wheel drive rear axle with a proper differential. I went as far as buying a ready-made diff. Unfortunately, it turned out to be much too long and there is no simple means of shortening it.
 These parts (intended for replacements for RC cars and probably made in the far east) are surprisingly cheap but there is a limit to how much I will spend on a trial-and-error exercise. Most of the postings in eBay are lacking in such vital details. I'll put the idea on the back burner and it's unlikely that I shall take it any further.
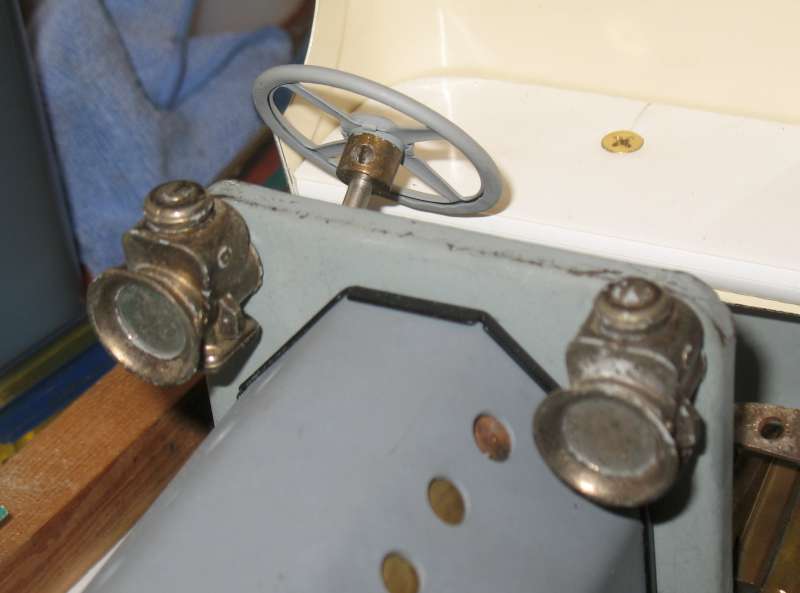
Another idea I was considering was to do something about the incorrect steering geometry inherent in the SA1 design. With the correct geometry, the front wheels are supposed to steer in such a way that they and the rear wheels are always revolving around a common centre point. This means that the inside front wheel must swivel more than the outside one. In the SA1, it's the other way round! I'm not sure if this was an actual design error by Mamod or just a case on not understanding that the problem exists atall.
These parts (intended for replacements for RC cars and probably made in the far east) are surprisingly cheap but there is a limit to how much I will spend on a trial-and-error exercise. Most of the postings in eBay are lacking in such vital details. I'll put the idea on the back burner and it's unlikely that I shall take it any further.
Another idea I was considering was to do something about the incorrect steering geometry inherent in the SA1 design. With the correct geometry, the front wheels are supposed to steer in such a way that they and the rear wheels are always revolving around a common centre point. This means that the inside front wheel must swivel more than the outside one. In the SA1, it's the other way round! I'm not sure if this was an actual design error by Mamod or just a case on not understanding that the problem exists atall.
 The above photo is of the unmodified SA1. It can be seen that the distance between the pivots on the moveable lateral bar is longer than the distance between the king pins, whereas It should be shorter. It can also be seen that there is not enough room to correct this by using a modified bar with closer pivots. Like the proposed diff, I'll put the idea on the back burner and it's unlikely that I shall take it any further.
One problem that I did manage to fix successfully was replacing the pair of sealed rivets holding the boiler to the bulkhead with a pair of soldered in threaded bushes.
The above photo is of the unmodified SA1. It can be seen that the distance between the pivots on the moveable lateral bar is longer than the distance between the king pins, whereas It should be shorter. It can also be seen that there is not enough room to correct this by using a modified bar with closer pivots. Like the proposed diff, I'll put the idea on the back burner and it's unlikely that I shall take it any further.
One problem that I did manage to fix successfully was replacing the pair of sealed rivets holding the boiler to the bulkhead with a pair of soldered in threaded bushes.
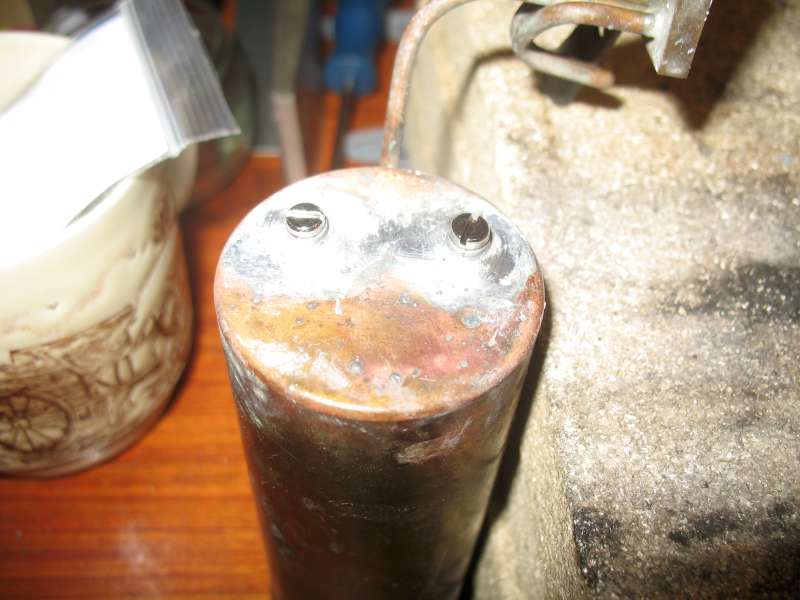 This will make repeated assembly and disassembly much easier. I intend replacing most of the other rivets with nuts and bolts where possible.
A puzzle that I'm now facing is inserting the boiler into it's housing with the steam pipe already soldered in place.
This will make repeated assembly and disassembly much easier. I intend replacing most of the other rivets with nuts and bolts where possible.
A puzzle that I'm now facing is inserting the boiler into it's housing with the steam pipe already soldered in place.
 I suspect that, in the factory, the steam pipe is soldered in after the boiler assembly has been completed, but access for the soldering torch is not easy.

22/11/2022
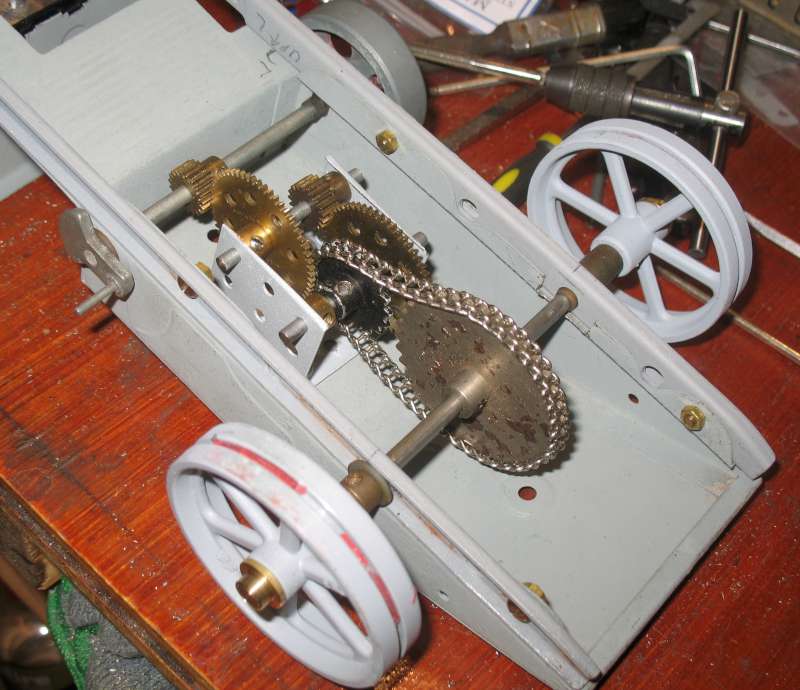
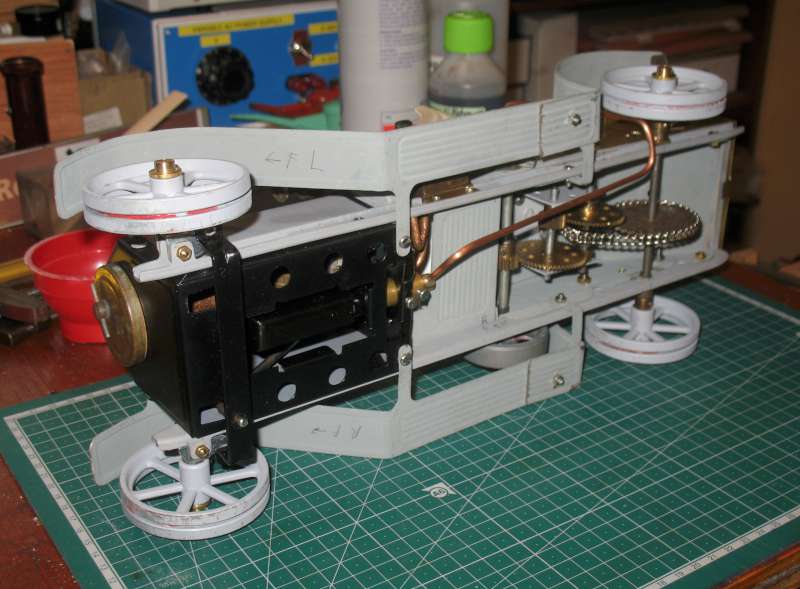
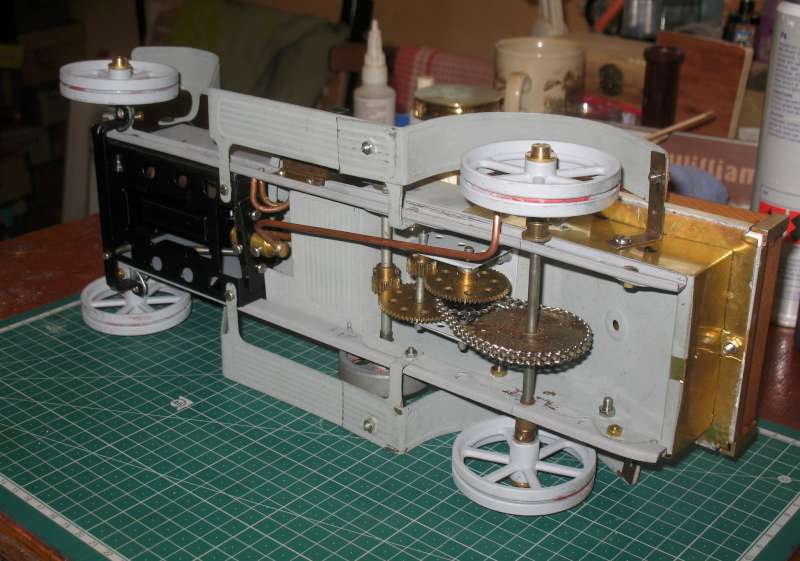
The next step was to take a closer look at the transmission. I know from experience that the SA1 final drive is prone to slipping so I decided to substitute a chain drive. To maintain the optimum reduction ratio, I also decided to replace the first stage with gears. Out came the old faithful Meccano:
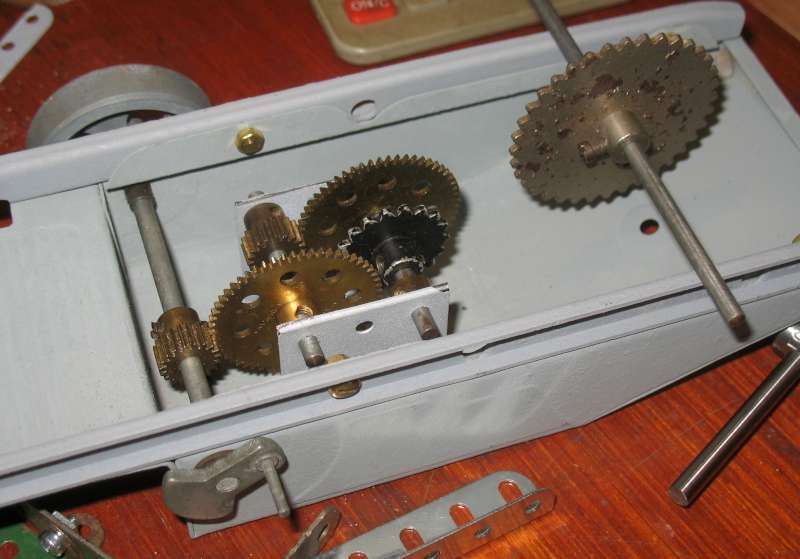 The big advantage of using standard Meccano parts is that I can easily play around with different gears to get the best overall ratio. The configuration in the above photo gives an 18:1 reduction compared with the 14:1 of the original SA1. If this turns out to be too slow then I can change one pair of gears to get 12:1. Another advantage of this arrangement is that it's quite compact, so I should be able to shorten the wheelbase a little, which is handy.
The Mamod crankshaft is 3/16" diameter compared with the standard 5/32" of Meccano shafts, so I had to drill and ream the boss of the first Meccano gear to fit. I will also have to do the same to the large sprocket.
The next tricky step will be to accurately drill the mounting holes in the chassis to ensure reliable meshing of the first gear stage.
The big advantage of using standard Meccano parts is that I can easily play around with different gears to get the best overall ratio. The configuration in the above photo gives an 18:1 reduction compared with the 14:1 of the original SA1. If this turns out to be too slow then I can change one pair of gears to get 12:1. Another advantage of this arrangement is that it's quite compact, so I should be able to shorten the wheelbase a little, which is handy.
The Mamod crankshaft is 3/16" diameter compared with the standard 5/32" of Meccano shafts, so I had to drill and ream the boss of the first Meccano gear to fit. I will also have to do the same to the large sprocket.
The next tricky step will be to accurately drill the mounting holes in the chassis to ensure reliable meshing of the first gear stage.
4/12/2022
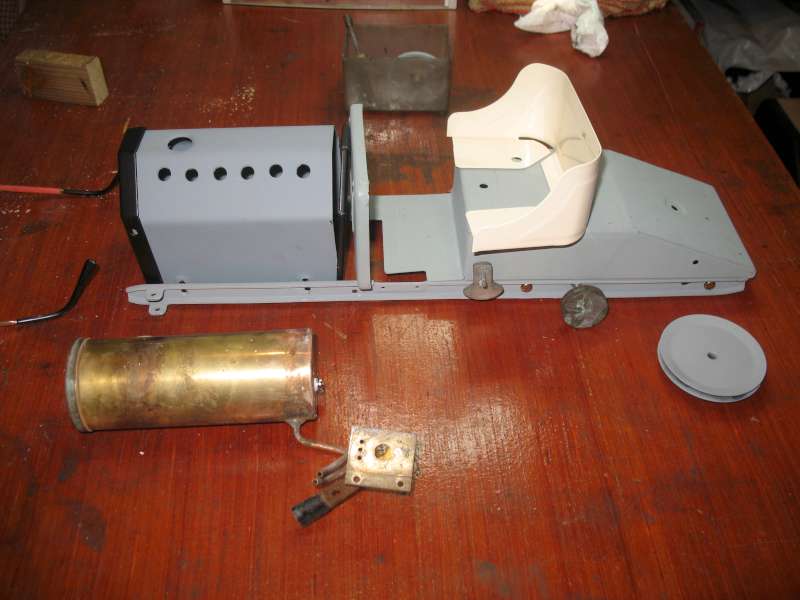
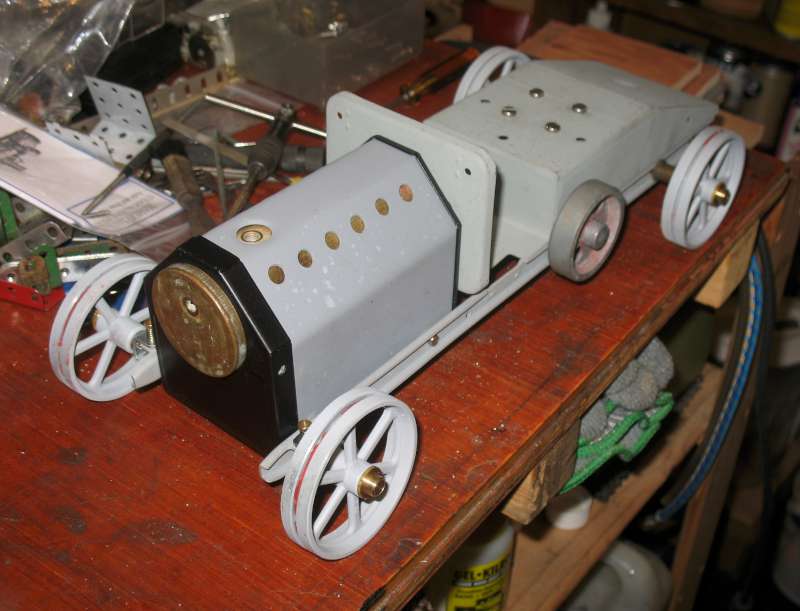
It's beginning to look more like a viable vehicle, now, with wheels and a boiler.

 I unsoldered the steam pipe from the boiler, so it fitted snugly into the firebox. The hole for the pipe is easily accessible for resoldering but I've yet to work out how to do that without burning the paint.
 The Meccano based transmission fits and works well. Using ordinary nuts and bolts to fix the transmission to the chassis, the nuts are inaccessible with the gears in place, and the gears cannot be inserted with the frame fixed into the chassis. Catch 22! This was solved by fitting captive nuts so that the screws can be fitted with access only from the outside. The nuts I used are what were called clinch nuts when I bought them, many years ago, but are now called rivet nuts, I believe. I drilled the holes in the chassis slightly oversize so that the position can be optimised for best meshing of the first gear stage. When it comes to final assembly, I'll use shake proof washers to make sure it doesn't move. (I also used the same nuts for the boiler/firebox, for similar reasons.)

 I was able to bring the rear axle forward by about 30mm; not as much as I had hoped, but a significant amount which will help fit onto the available shelf space! I'll probably move the seat forward a bit so that the pickup bed doesn't overhang too much at the rear.
11/12/2022
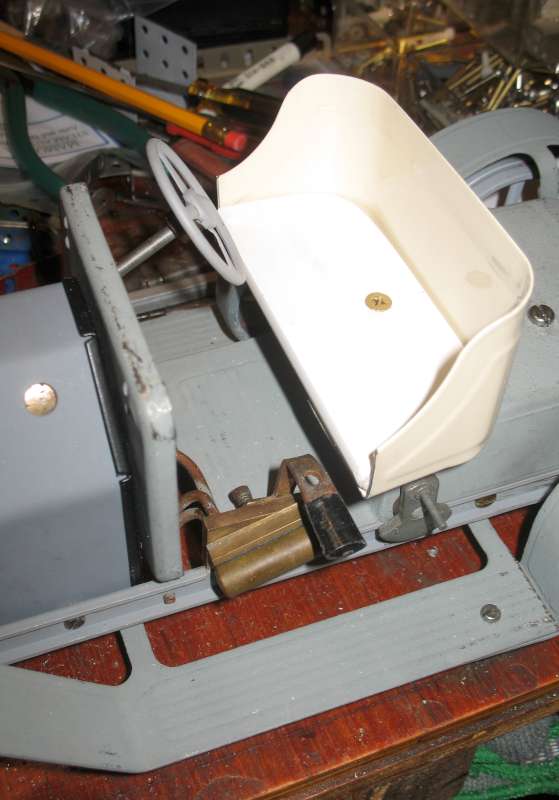
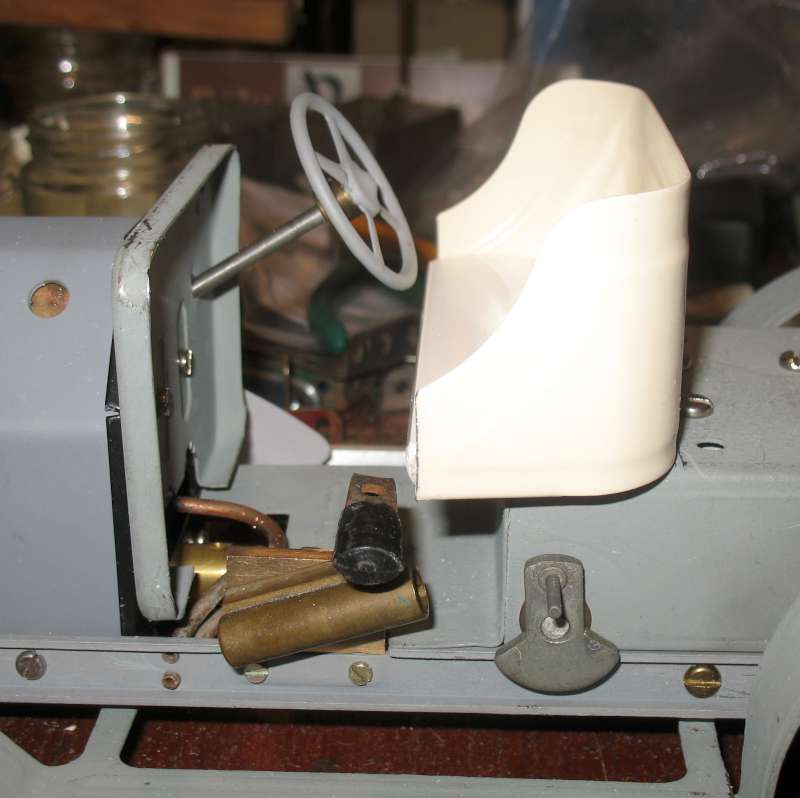
Having moved the rear axle and the seat forward, I now realise that the seat is in the way of the reversing lever. I had to bend the lever at right angles to clear, and I hope this won't cause any problems in running. Instead of the rather sporty leather seat, I'm using a bit of PVC cut from a shelf, which looks more appropriate (or will do when painted). I hope it doesn't get too hot!

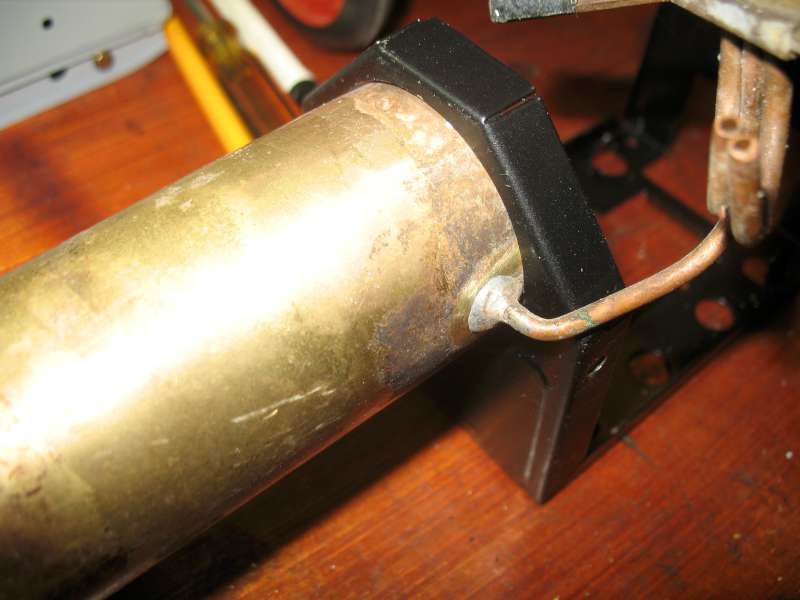
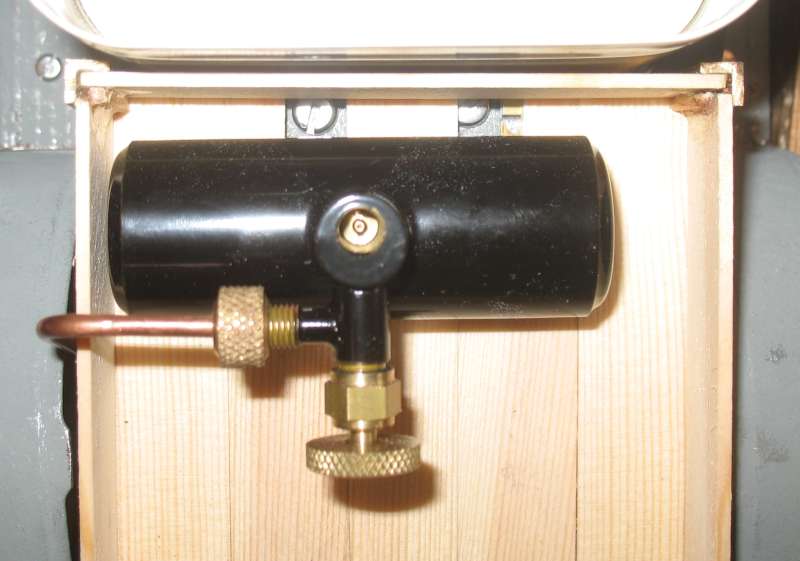
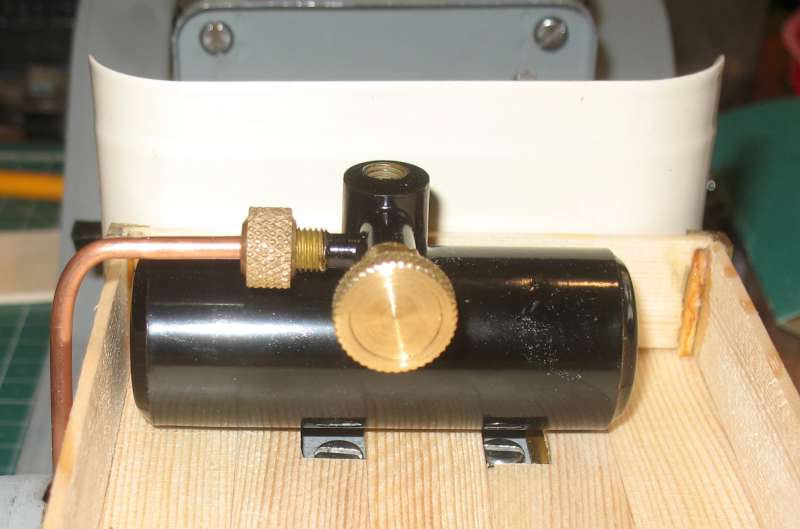
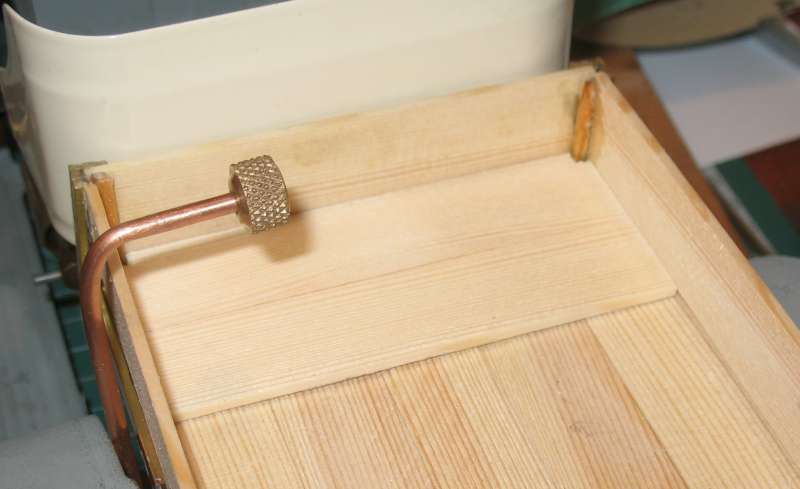
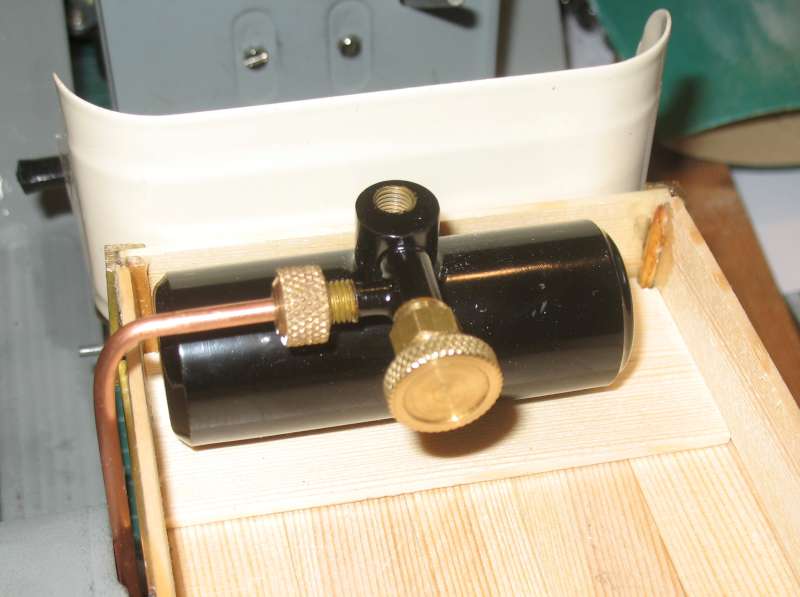
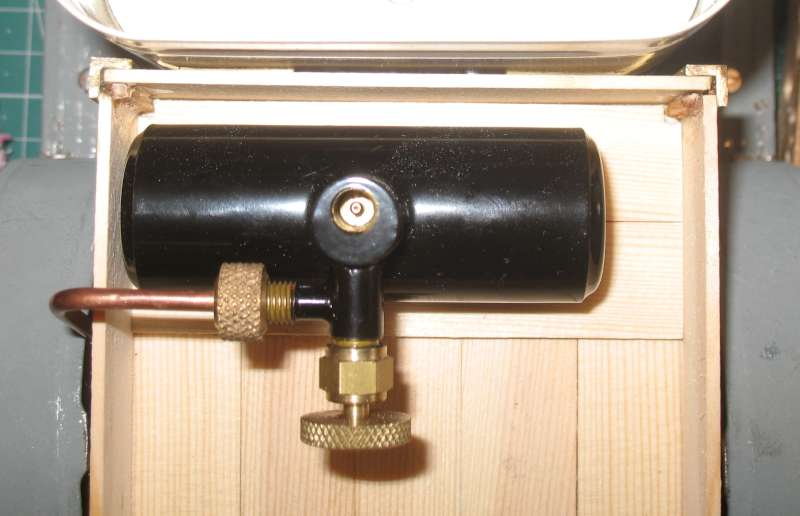
 I've decided to fit the Bix burner intended for the SA1. This has been specifically designed for the SA1 and it's derivatives and is made to clamp onto the rear of the firebox. Because I've moved the seat, I'll have to reroute the pipework (and maybe shorten it) to fit.


 Things are never as simple as they seem at first. Because the wheelbase is now shorter, I've had to shorten the running boards. While I was doing that, to make the mudguards look more utilitarian, I removed the flairs at each end.


 I now have to think about the rear end, which I intend making out of wood planks and metal angle bars. This will need some thought because it has to incorporate the Bix gas tank.


3/1/2023
Following a suggestion from a forum member, I shortened the seat by a couple of cm, and I agree, it looks much better. Ironically, it looks as if the bend in the reversing lever is now unnecessary :-)
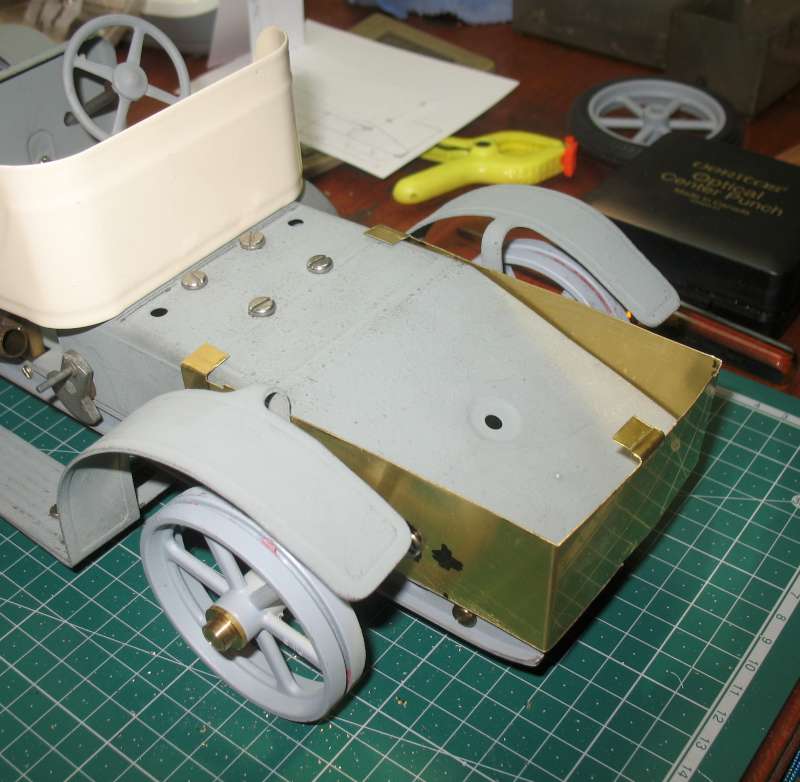
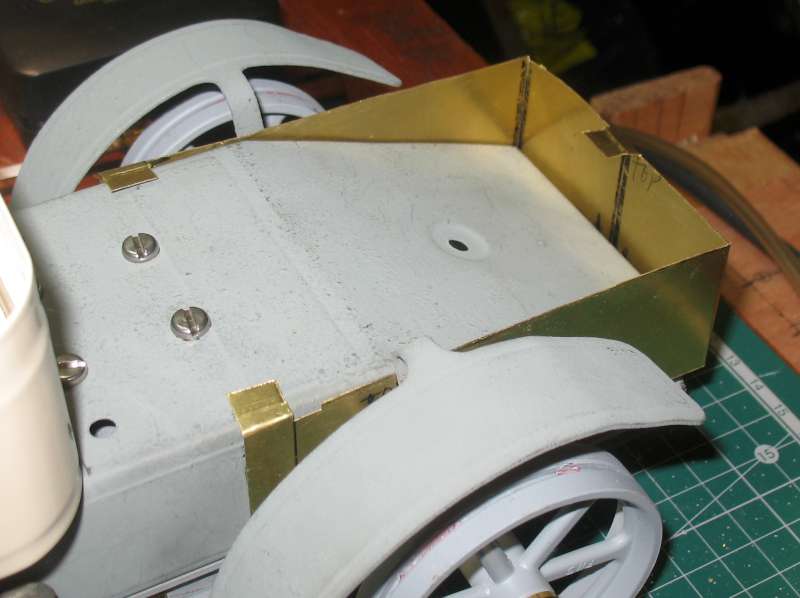
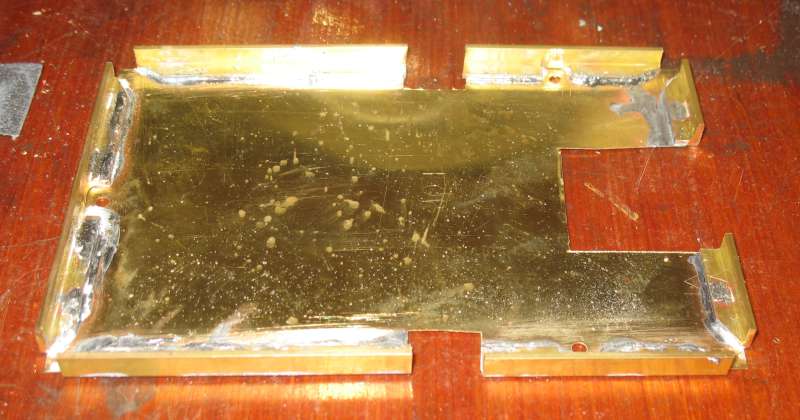
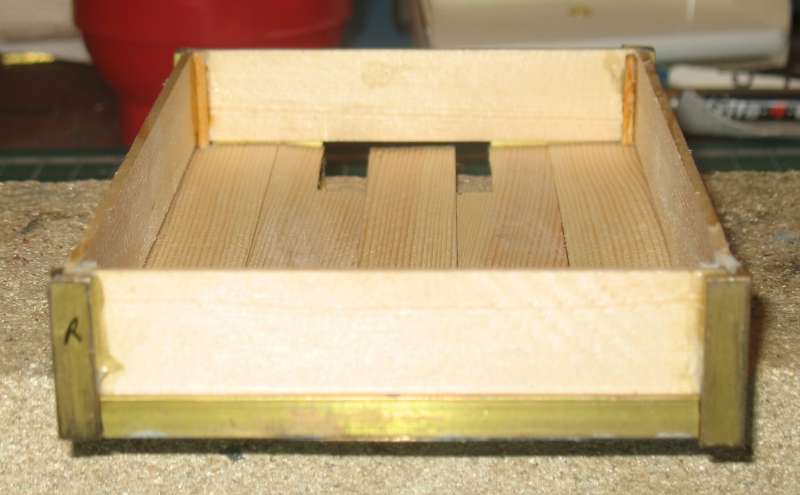
 The next step was the support frame for the pickup bed. Having made a paper template to check for fit, I cut it out in sheet brass, with a few tabs for fixing (which may not be required but easier to remove than add later).
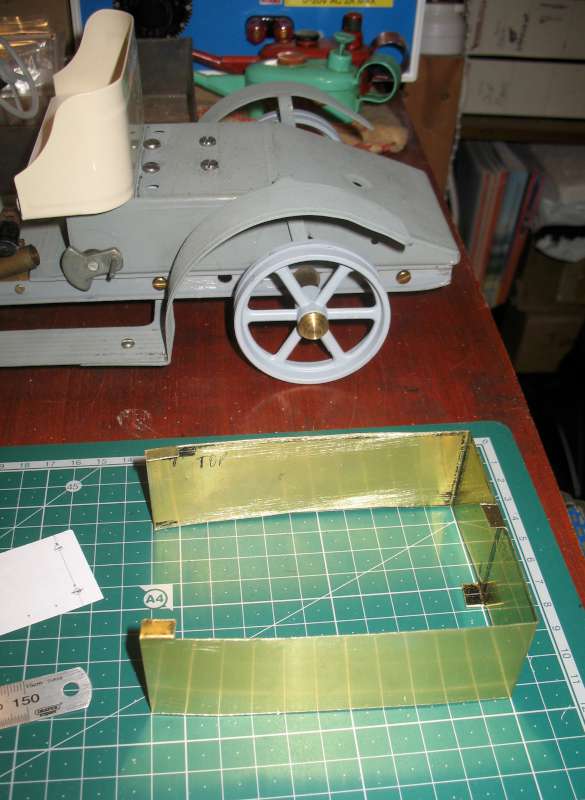

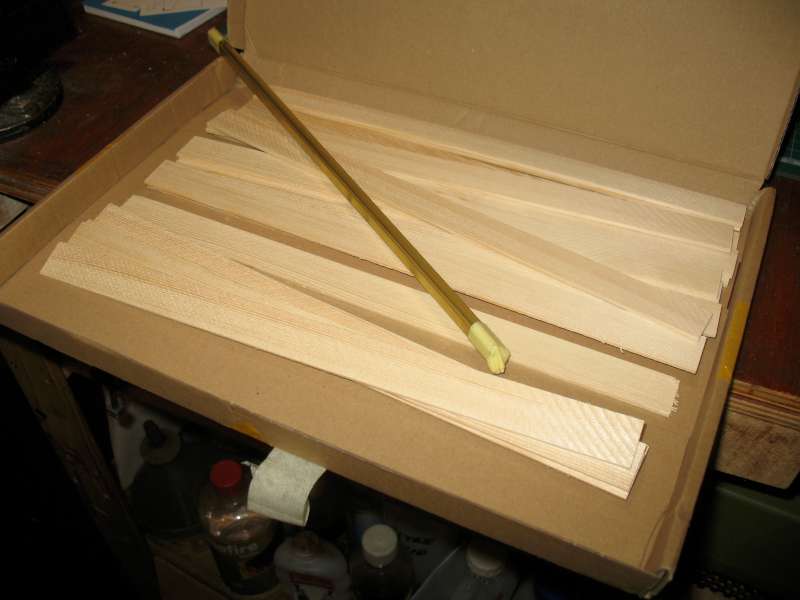
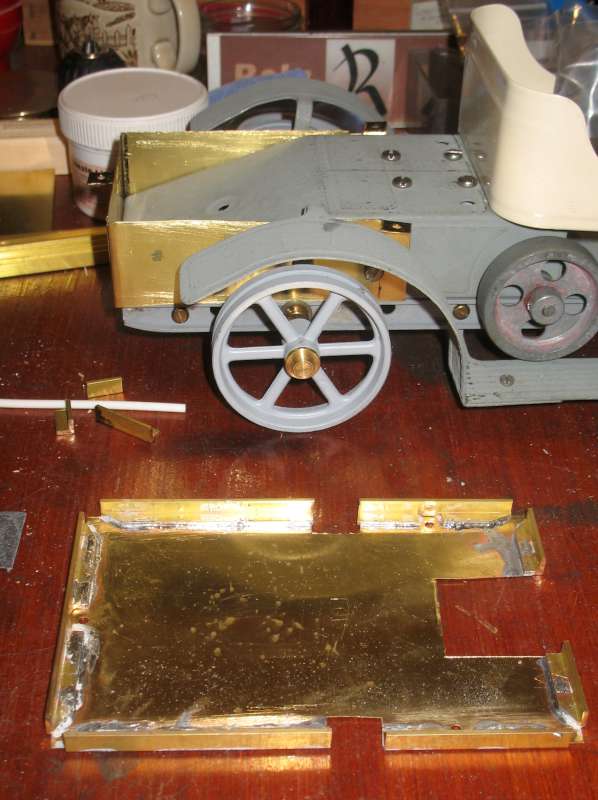
 I have some thin strips of wood and some brass angle section to make the bed itself.
10/2/2023
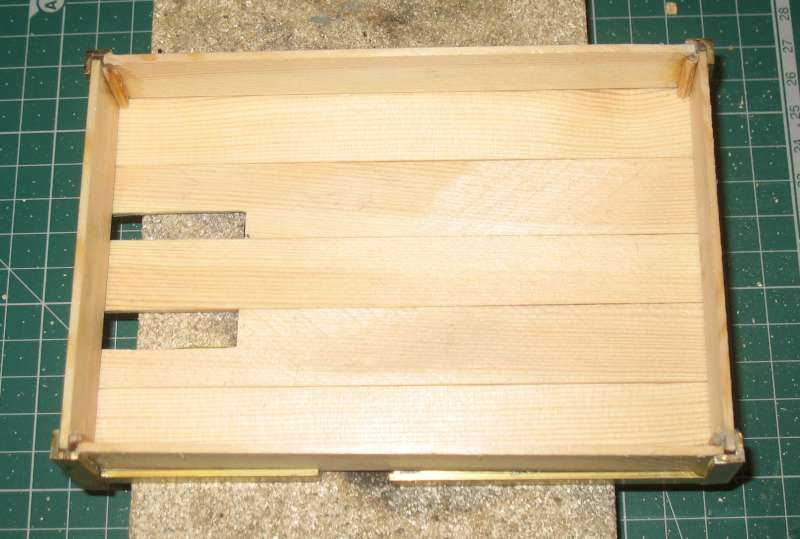
I now know how Thomas Edison felt when he said "I have not failed. I've just found 10,000 ways that won't work".
While trying to build the pick-up bed, I didn't quite reach 10,000 but I did try at least half a dozen methods that either were not satisfactory or didn't work atall. I did succeed in the end. It's far from perfect but it will have to do. I didn't photograph all the failures, for which, I'm sure, you will all be thankful.
One of the main problems was the support brackets for the mud guards. I started off by cutting gaps in the bed but it looked awful. In the end, I cut the existing brackets off the mud guards and made new ones fixed in a different location.
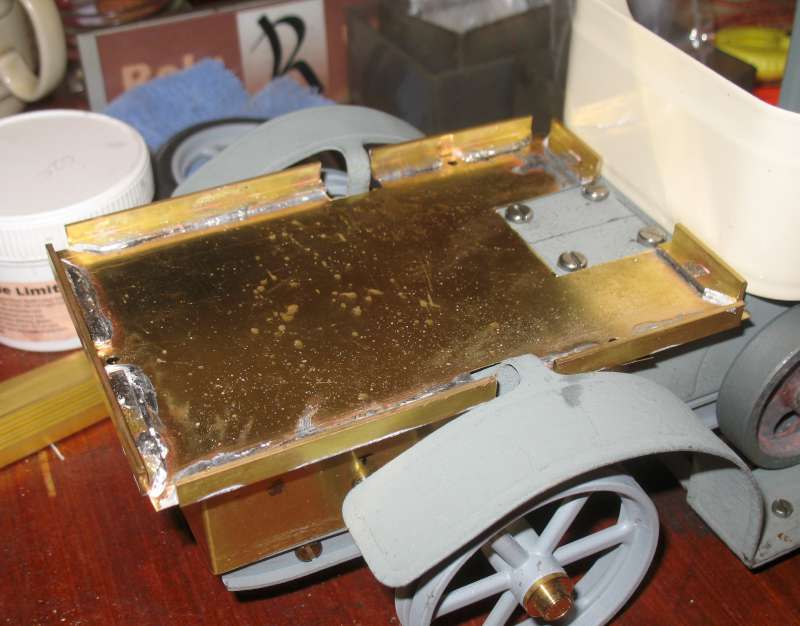 The screws fixing the bed to the chassis are obscured by the sides and ends. I started by cutting access holes in the bed but, again, it looked awful. In the end made it so the vertical part is removable from the horizontal part. This means that the vertical part has to be reasonably rigid on it's own, which required extra stiffening at the corners. There are still gaps in the floor boards to access the screws holding the gearbox. These are needed for final adjustment of the gear meshing, as mentioned earlier. These gaps, hopefully, will be at least partly covered by the gas tank.
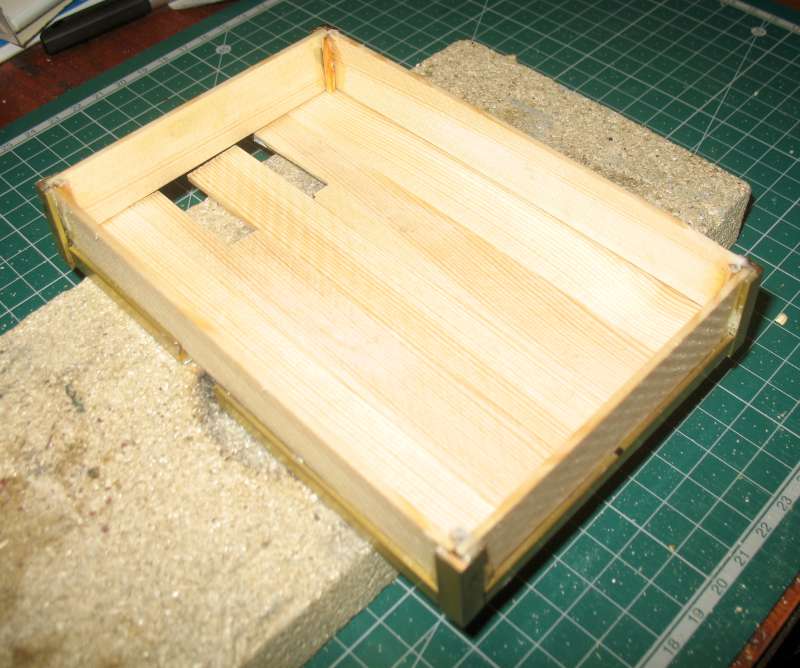
 At the moment, the floor boards are loose and keep moving about, so I'll have to find some way of holding them together. The brass parts will be painted. I haven't yet decided what to do with the wood parts. I can either stain them or leave them to age naturally.
18/2/2023
Nearly there!
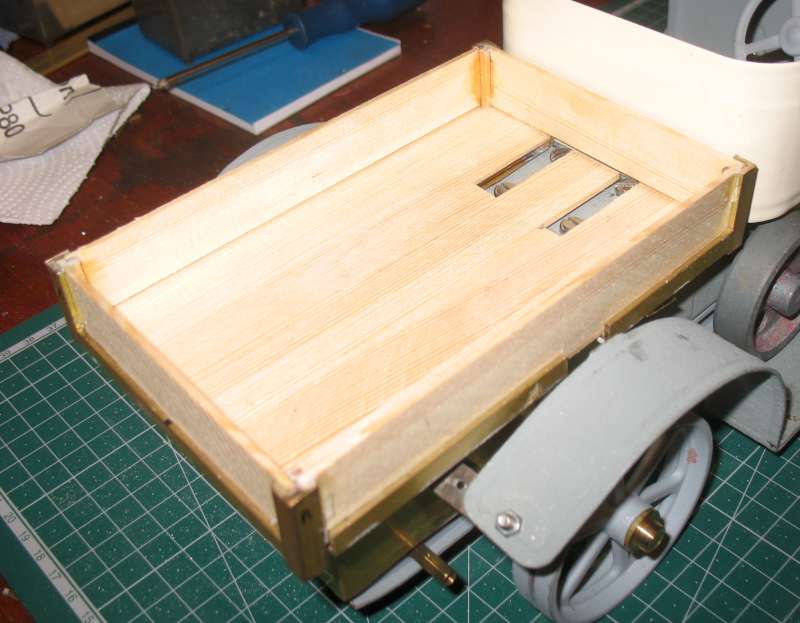
The gas tank doesn't quite hide the gaps in the floor boards, so I've added a small extra plank that is easily removed.
 The original headlamps are a bit ostentatious for a humble pickup. I'll try to find something a bit more suitable (any ideas?)
 I decided to stain the wooden planks, on the grounds that handling with oily fingers might prevent natural aging.
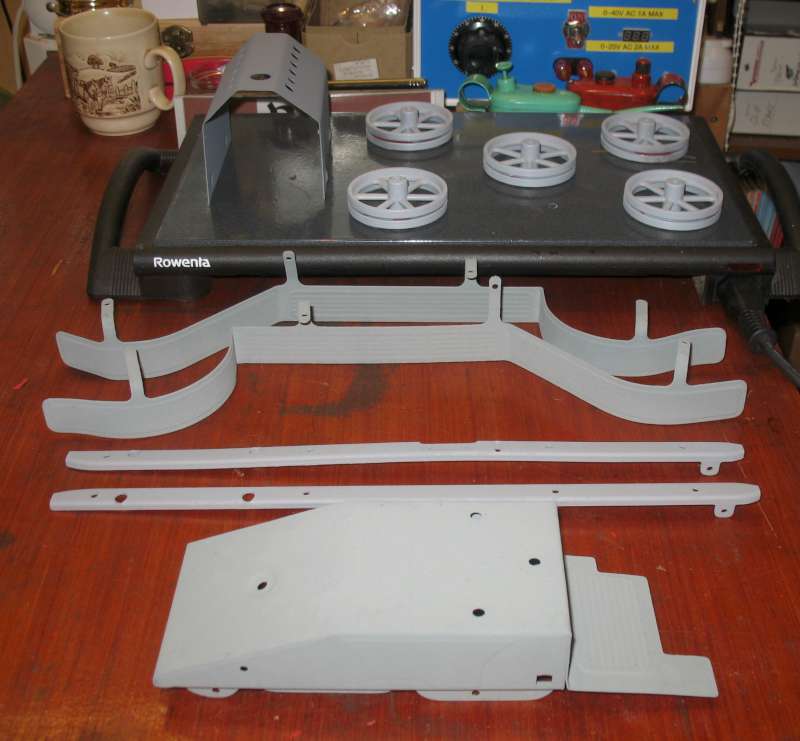
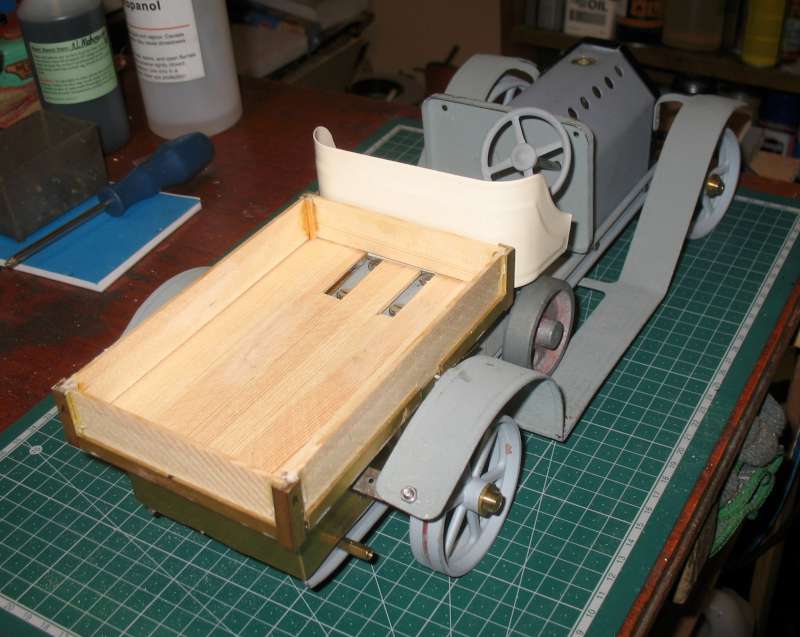
 Nearly ready to be dismantled again for final painting (the tyres to be fitted after painting) ...
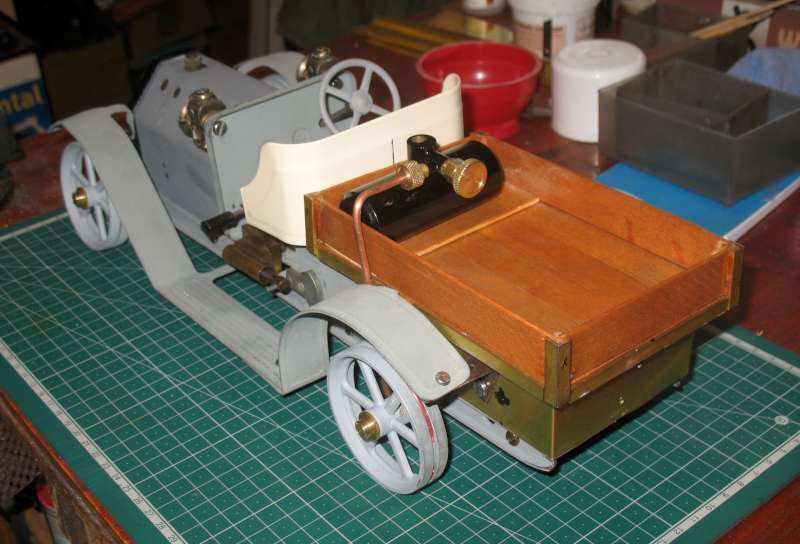
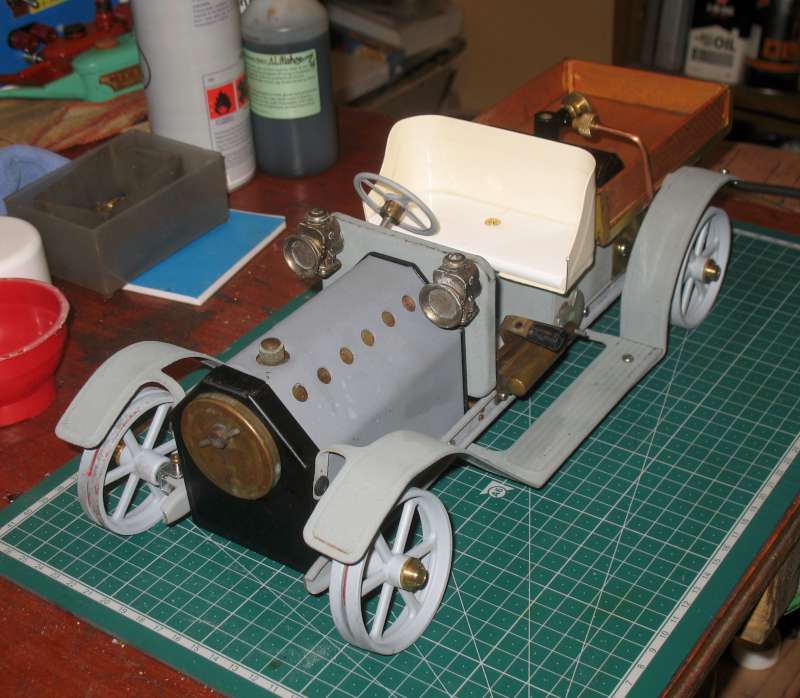 .. but before that, I wanted to do a quick test on air. It's a bit stiff, which is not surprising given the condition it was in, so I'll have to fix that before final reassembly. It works, though :-)
3/4/2023
I've been busy painting (who says I'm pinching ideas from Henry Ford's notebook?).
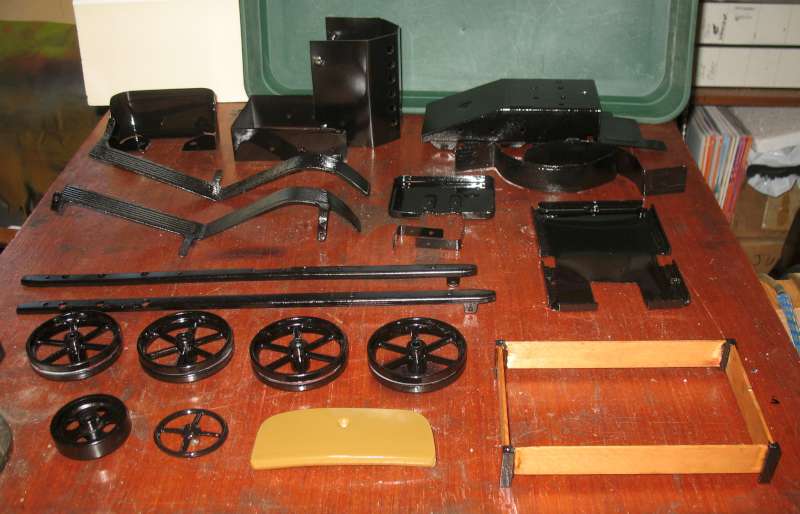 There's still a couple of things to fix before reassembly.
You may notice in the photo that the plastic seat (front centre) has warped, possibly a reaction with the solvent in the paint or, more likely, I warmed it up too much in drying! I need to remake it using wood.
The other problem is the steam pipe came unsoldered from the boiler. I shall make a new pipe with new annealed copper.
There's still a couple of things to fix before reassembly.
You may notice in the photo that the plastic seat (front centre) has warped, possibly a reaction with the solvent in the paint or, more likely, I warmed it up too much in drying! I need to remake it using wood.
The other problem is the steam pipe came unsoldered from the boiler. I shall make a new pipe with new annealed copper.
22/4/2023
I have remade the pipework with new copper pipe, well annealed, and soldered in place on the boiler and engine port face. This was more tricky than I expected; mainly because of the restricted access.
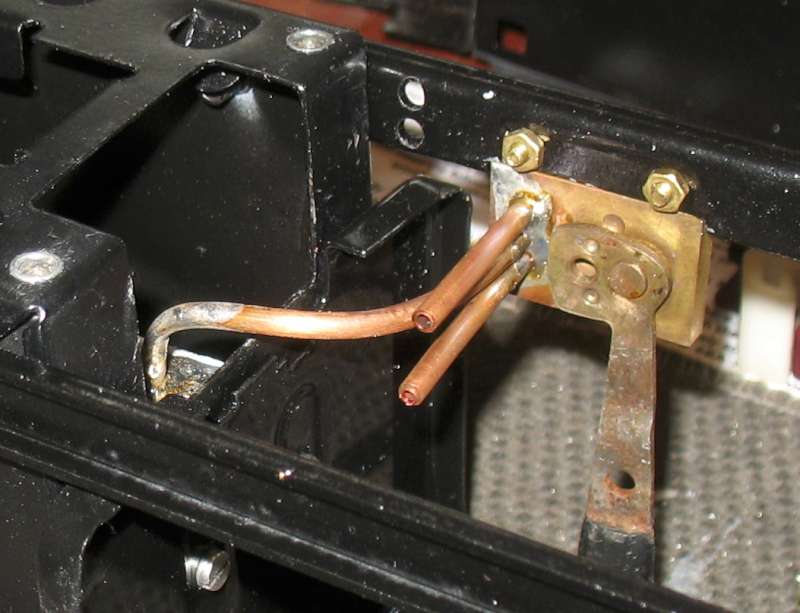 Now that I've got the tricky bit done, I just have to remember how it all goes back together again!
I'm not sure where I'm going to route the two exhaust pipes. They originally went via sharp bends to the two nearby holes in the chassis. On the later version of the SA1, they were just bent downwards . I might do that or I might extend the pipes to exhaust on the other side of the chassis.
Now that I've got the tricky bit done, I just have to remember how it all goes back together again!
I'm not sure where I'm going to route the two exhaust pipes. They originally went via sharp bends to the two nearby holes in the chassis. On the later version of the SA1, they were just bent downwards . I might do that or I might extend the pipes to exhaust on the other side of the chassis.
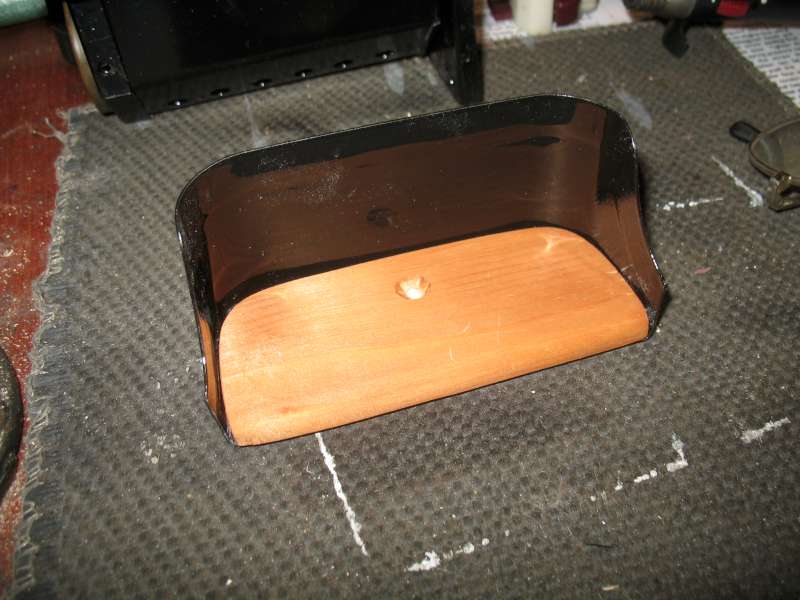
23/4/2023
I forgot to mention, yesterday, that I've made a replacement seat using real wood. Not only is it (hopefully) more heat resistant, but it looks better anyway.
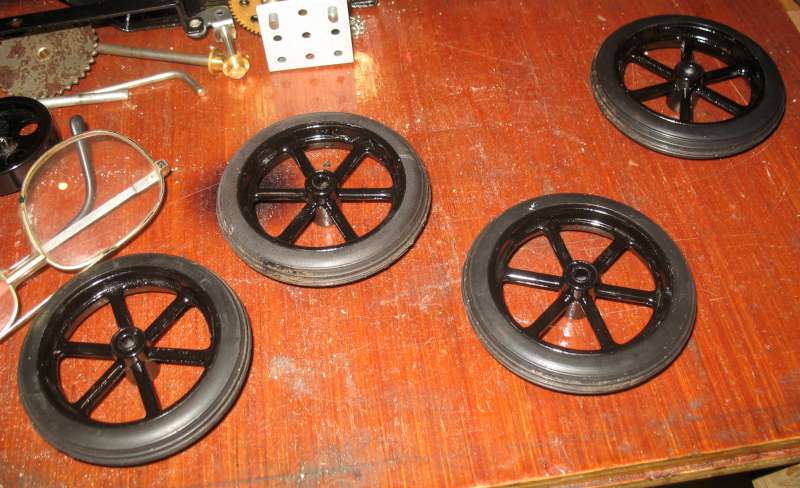
26/4/2023
I had a bit of a struggle getting the tyres back onto the wheels, even after soaking in warm water for 10 minutes, but I did get them on eventually. I suspect they have hardened a bit with age.
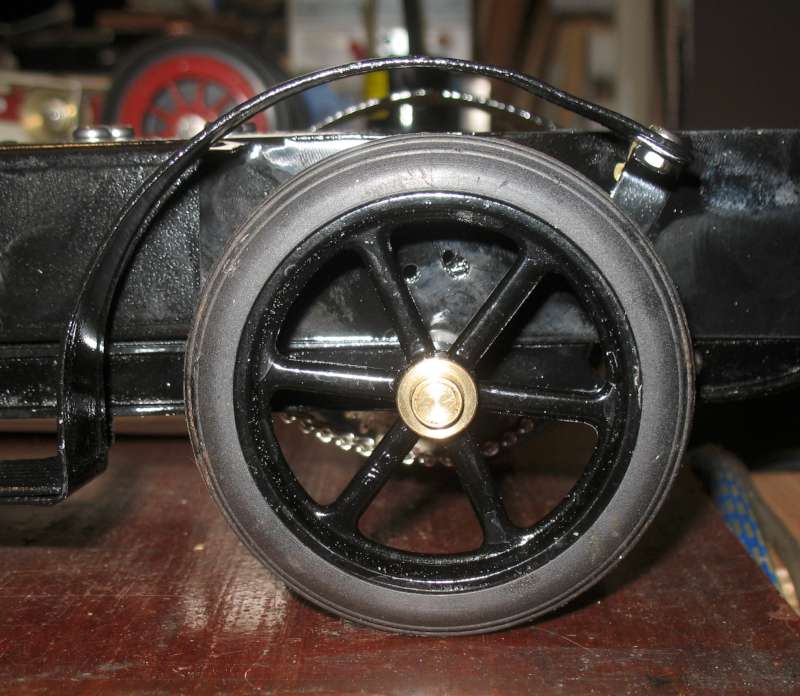
 Then a quick check for clearances; this being the first time of fitting the wheels, complete with tyres, after modifying the mud guards / running boards. They do look a bit close but there is no interference.

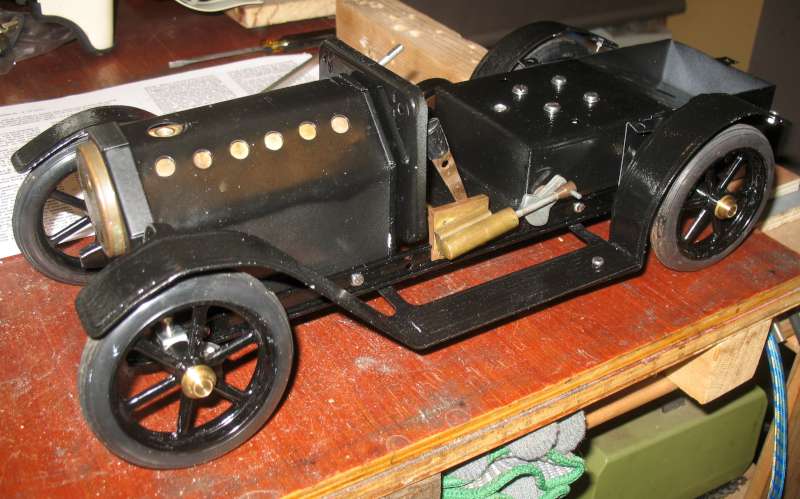
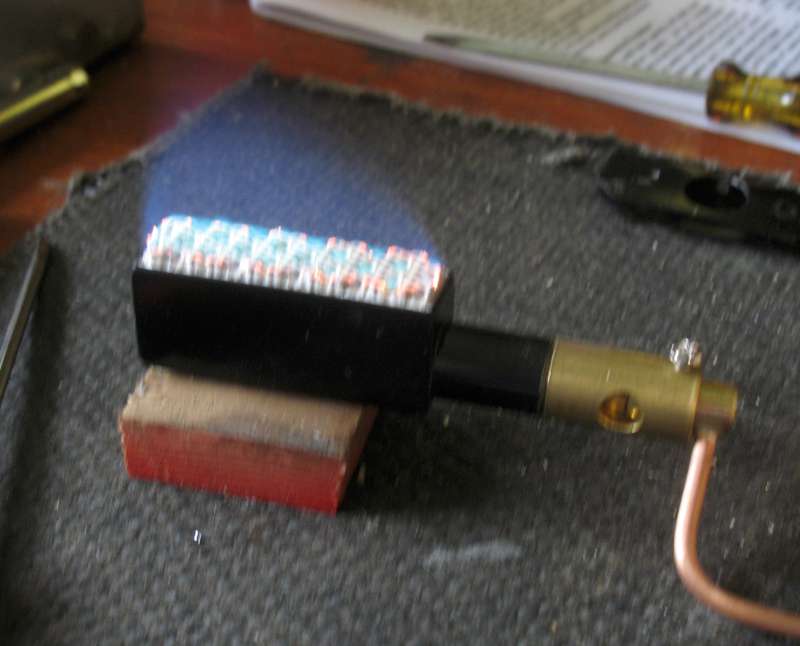
27/4/2023
I had to adjust the burner flame with it on the bench because the flame is not visible inside the firebox! As it happens, the optimum position was with the jet fully inserted, so that made it easier for installation.

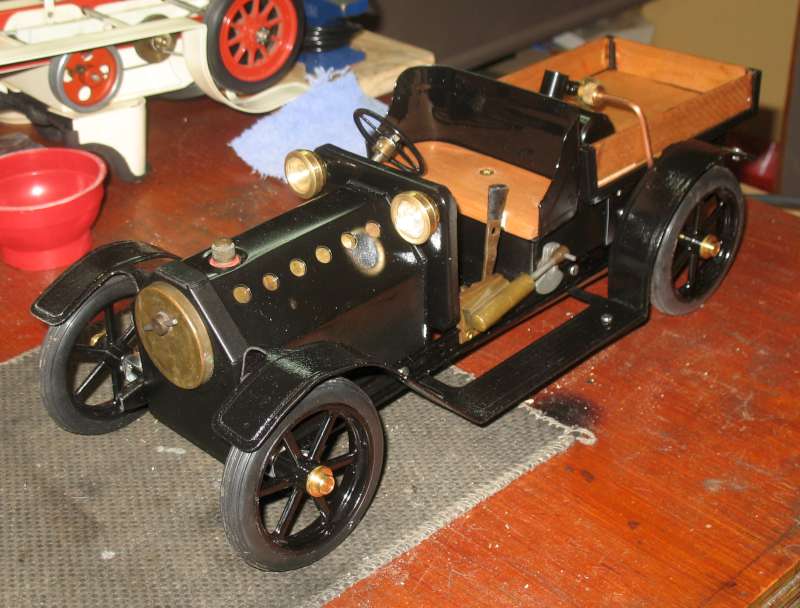
 And - DA-DA - here she is ready for her first steam test (which she passed with flying colours).